The purpose of this lab is for you to learn and customize parts of your shell in order become more efficient. After you finish this lab, you will have a colorful terminal and be able to create short programs and run them from your home directory.
Before starting the lab, OPEN THE REFERENCE SHEET
ONLY RUN THIS ONCE.
cd; wget -NP ~/bin https://raw.githubusercontent.com/PurdueCS190/lab4/master/dirinfo
Copy the command above and run it within the terminal. It will not create a folder named cs190lab4 located within your home directory, but rather a bin folder with a file called dirinfo inside.
We say to only run this once because it will overwrite your old copy, so if you made changes they could be lost.
- This is the key at the top left of the keyboard, just below the ESC key.
- No shift is needed
- Shares a key with the ~ symbol.
- There is an environment variable called PWD, among many other ones
- To print it, you can execute
echo $PWD
pluma <filename> # ex. pluma ~/.zshrc
pluma <filename>    # locks up the terminal, when you quit terminal, gedit gets killed.

pluma <filename> &  # terminal is not lock up, pluma is detached, terminal and pluma
                    # are not linked in any way
There are only two tasks in this part, and they both produce the same output.
CWD = Current Working Directory
Working Directory:  not important

Desired Action:     print "CWD: " and the current working directory on the same line.
                    MUST USE BACKTICKS

Example Output:     CWD: /homes/kkohlmor/cs190lab4

You will use the answer in Part 2. No answers.txt this week.
In this task, you will be working with the environment variable named PWD.
Working Directory:  not important

Desired Action:     print "CWD: " and the current working directory on the same line.
                    MUST USE ENVIRONMENT VARIABLES

Example Output:     CWD: /homes/kkohlmor/cs190lab4

You will use the answer in Part 2. No answers.txt this week.
There is a shell script named dirinfo in your ~/bin directory. You will edit this file in a text editor (pluma) to satisfy the follow requirements.
pluma ~/bin/dirinfo &
- Prints the current working directory in the format of Task 1/Task 2
- Prints the contents of the working directory.
- The command used to satisfy #2 must contain two relavent flags (like -a or -l). Your choice. Be prepared to explain your choice of flags.
Detailed instructions are included in the comments of the dirinfo script.
To help you in the search for flags for the 3rd requirement, you may find the man program helpful.
man <command_name> # ex. man pwd
To navigate the man pages, you can click d and u to navigate down and up the page, and can click q to exit the man page.
If we tried to run the dirinfo command right now, it would say "Permission Denied". To fix this, we need to make the dirinfo executable. Run the command below to give your command executable rights.
chmod +x ~/bin/dirinfo
Finally, run the command
dirinfo
This is the section that makes the terminal more personalized and usable.
First thing is first, we're going to replace Bash with Zsh.
To do so, run
ypchsh $USER /bin/zsh
At home you'd run chsh -s /bin/zsh, but CS computers require the ypchsh command
This changes your default shell to Zsh, so everytime you login Zsh will now load.
You should note that it might take a few hours for these changes to propagate across the CS servers. Until then you can just run Zsh manually by typing zsh.
Oh-my-zsh is addon to zsh that let's you easily configure Zsh.
To install it run
curl -L http://install.ohmyz.sh | sh
Let's open up Zsh and see our new shell!
To do so, run
zsh
If you see a weird screen like this
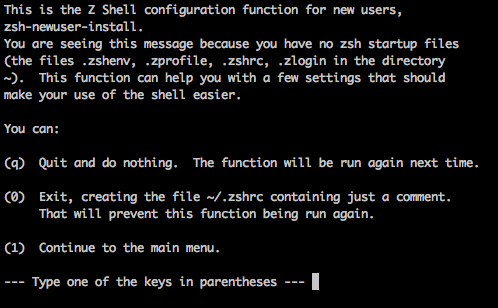
just press 0
To change your color scheme modify the .zshrc file's ZSH_THEME enviroment variable.
You can see a list of available themes here.
To do so, run
pluma ~/.zshrc &
After you've changed your ZSH_THEME run the following command to reload your changes
source ~/.zshrc
If you see weird symbols, then you might have picked a theme that doesn't play well with the CS terminal and it's default encoding. You can change the encoding by going to Terminal -> Set Character Encoding -> Unicode.
Edit your ~/.zshrc file in a text editor.
You should create two aliases:
- Shorten the command
dirinfoto justi - Your choice.
NOTE: Everyone has to do this, even if you've already customized your terminal before this lab.
Run the following command:
source ~/.zshrc
In a terminal, with the TA present:
- run and explain answers to both Task 1 and Task 2
- run
dirinfo - run
i - run your personal alias
- ask a question about something you don't understand.
If you find any bugs within the code or misspellings in the write-up, please tell the TA. Thanks!